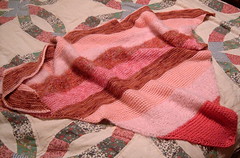
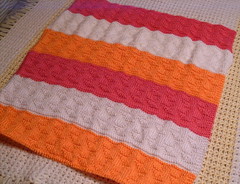
Yippee! This morning, I finally finished making a handknit scarf for the Special Olympics. I was afraid that I would miss the deadline for the project. I used the pattern called "Racing Stripes Scarf" from the 2008 Knitting Pattern a Day.
I tried it on, to make sure it's the right length. It looks good!
Wednesday, December 31, 2008
Christmas Knitting
Saturday, December 20, 2008
Wool Soaker Sack for a Newborn
One of my friends is having a baby soon, and plans on using cloth diapers and wool soakers.
I decided to make a newborn-sized wool soaker sack, using the free knitting pattern I found online called "Sheepy Sack". The yarn I chose is Lion Fishermen's Wool, since it still has the lanolin in the wool, to make it waterproof. I hope it works well for them.
It took a while to make. The ribbing at both ends was done with size 4 needles, and the stockinette through the middle was on size 7 needles. I worked on it between other projects. It's nice to get it completed. :)
Here's a closer view of the waistband. I chose to make the tie with 3 strands of yarn braided together. I like the way it turned out.
Saturday, November 29, 2008
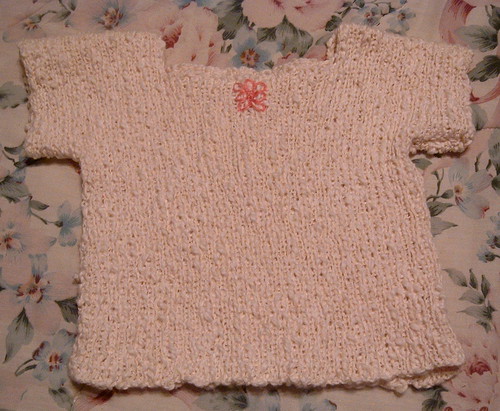
Handknit Cotton Baby Top - Complete!
Woo Hoo! Tonight, I finished knitting the little cotton baby top! I've been working on it for the past few months, and really wanted to finish it before the end of the year. Mission accomplished!
I was still knitting it tonight, and finally cast off all the stitches at about 10 PM.
After seaming it, I decided it looked nice, but needed a little something added.
So, I added the little embroidered flower, using some linen embroidery thread. I like it!
I was still knitting it tonight, and finally cast off all the stitches at about 10 PM.
After seaming it, I decided it looked nice, but needed a little something added.
So, I added the little embroidered flower, using some linen embroidery thread. I like it!
Friday, November 21, 2008
Making a Vintage Baby Top
I've been working on this baby top for a long time, and it's FINALLY starting to look like the photo in the knitting book. I'm using a pattern from a vintage Bear Brand Baby knitting book.
Here's the pattern photo in the book:
And here's my knitting so far:
I'm using a pretty vintage cotton yarn, called "Cotton Carole" by Jessan. I just love the fabric it makes.
I got the yarn in a vintage knitting kit on eBay. It looks like this kit was originally sold at Kmart!!!
Here's the pattern photo in the book:
And here's my knitting so far:
I'm using a pretty vintage cotton yarn, called "Cotton Carole" by Jessan. I just love the fabric it makes.
I got the yarn in a vintage knitting kit on eBay. It looks like this kit was originally sold at Kmart!!!
Sunday, November 16, 2008
Saturday, November 15, 2008
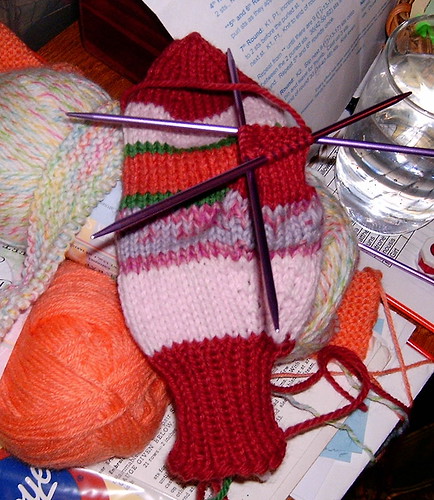
Making Wool Mittens for Charity
Right now, the Afghans for Afghans project is requesting 300 pairs of handknit wool mittens by November 20th. So, several charity knitters are hard at work on that request.
Here's my attempt at making a pair. I just finished this one mitten last night, and have cast on the second mitten now. I'm using bits of 100% wool yarn that was given to me by a friendly Ravelry member for my charity knitting. I love this yarn! So soft and warm.
I think I'll have to make myself a pair of wool mittens now. :)
Monday, November 3, 2008
Great Deal on Cotton Yarn!
Woo Hoo! I won an AWESOME auction on eBay. Unbelievable.
A box of 96 skeins of cotton yarn - for 20 bucks....INCLUDING SHIPPING!
So, that means that I got this yarn for 20 cents a skein. Good thing too...we need cotton yarn to make Pet Snuggles for animal shelters. So, it was a God-send. A real blessing. Way cool!!
A box of 96 skeins of cotton yarn - for 20 bucks....INCLUDING SHIPPING!
So, that means that I got this yarn for 20 cents a skein. Good thing too...we need cotton yarn to make Pet Snuggles for animal shelters. So, it was a God-send. A real blessing. Way cool!!
Sunday, November 2, 2008
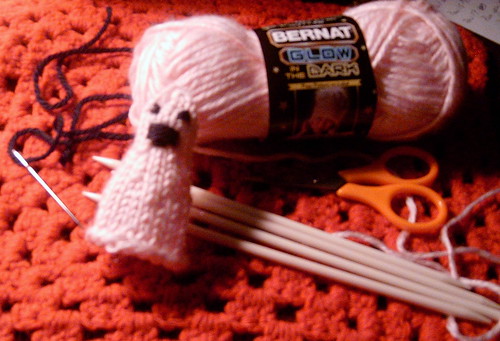
Glowing Ghost Finger Puppets
For Halloween, I decided to make little glow-in-the-dark ghost finger puppets for my piano students treat bags. I used Bernat Glow in the Dark yarn, and size 6 dpns. Quick and easy!
Here's the free pattern I designed:
Glowing Ghost Finger Puppet
Materials: Bernat Glow in the Dark yarn, little bits of black worsted weight yarn for embroidery, size 6 (US) double pointed knitting needles, yarn needle for embroidery.
Cast on 18 stitches, then divide the stitches on 3 needles (6 stitches on each needle). Join in the round.
Knit every stitch for 7 rounds.
Round 8: Knit 2 together, Knit 4. (Repeat this on each needle.)
Round 9 & 10: Knit
Round 11: Knit 2 together, Knit 3.(Repeat this on each needle)
Round 12 through 17: Knit
Round 18: Knit 2 together all the way around.
Cut yarn about 8 inches long, and attach a yarn needle, then run the yarn through the remaining stitches. Pull it tight, fasten tightly, then push it through to the center. Weave in loose ends.
Use a small amount of black yarn to embroider eyes and a mouth. Enjoy!
Sunday, October 12, 2008
Working on My Bulky Cardigan Again!
Woo Hoo! I'm finally knitting one of my old projects again.
I cast on this bulky cardigan over 3 years ago, and set it aside to work on other projects. I got so busy with all the charity knitting projects I was working on, that I didn't think I would ever work on this cardigan again.
This past week, I pulled it out and got to work on it again.
At that time, I had finished the back, and had started working on the left front.
In no time at all, I finished the left front and cast on the right front. I think it's gonna go quickly now! :)
Tuesday, October 7, 2008
Catnip Toys for Pets of Friends
I'm allergic to cats (and any other furry or feathered animal), so I can't have one of my own.
But, recently I decided that I wanted to make Oddball Pet Snuggles for animal shelters. Now, a group of us in the Knitting Help Forum are taking turns knitting sections of cushy little blankets for the pet cages.
When we each finish knitting our section, we mail the project to the next knitter on the list. We usually include little gifts in our Oddball packages. Since most of our participants have pets of their own, we will sometimes be sending treats to the pets instead of to the knitters.
I needed to send out 3 pet snuggles to the next knitters. All of them have cats as pets, so I decided to make catnip toys for their kitties. :)
Since I've never owned a cat, I had no IDEA what catnip was. I went to Walmart to see if I could find some in the pet section. Lo and behold, there it was!
I already had everything else I needed to make the toys, including a free pattern I found online called "Catnip Mice". So, I gathered everything together in one spot, so I could get going on making them all: Polyester fiberfill, Catnip, Jingle Bells, Yarn, Knitting Needles, Scissors, and a Tapestry Needle.
Before I sat down to knit, I put the tea kettle on, and made myself two cups of black tea. I needed the strength! I made one cup of Earl Grey, and one cup of English Breakfast Tea.
After a few sips, I got to knitting. Pretty soon, I had the body of my first catnip mouse ready to be stuffed.
I put in one jingle bell, then a little fiberfill, then some catnip, and a bit more fiberfill. Then I stiched it closed, and arranged the tail to look like a mouse.
Not bad! But, I did NOT enjoy making it with two needles. And I wasn't thrilled with the look of garter stitch either.
So, I got out of my comfy knitting chair and found some double pointed needles in the right size. Then sat back down, took another sip of tea, and started in on another mouse.
Much better!
By now, I knew how to make catnip mice with my eyes closed, so I chose another color of yarn, closed my eyes and started knitting. (tee-hee)
It turned out even better than the one before! Hey! Maybe I should ALWAYS knit with my eyes closed! Ha!! (just kidding, of course....) :P
Pretty soon, I had four little catnip mice, ready for battle with some kitties.
After making those four mice, I decided to try a different pattern I found online, called "Kitty Beanbag Zoo". It took a LOT longer to make than the mice, and used a lot more yarn, and a lot more catnip. I didn't really like the look of it either. So, I decided to just make one of those.
(I added a tail to mine, so it kinda turned out looking like a stingray!)
After that little tangent, I decided to veer back onto my original path....and made some more Catnip Mice. Besides....they were quick and easy. ;)
After just a couple hours, I had 11 catnip toys, ready to go!
It was fun. Now back to my regular knitting.
Thursday, September 25, 2008
Yay! I Finished the Duplicate Stitch!
Wednesday, September 24, 2008
Duplicate Stitch Embroidery on Stockinette Knitting
It's my turn to knit a section on the "Go USA" Oddball Baby Blanket for the Southeast Region. I wanted to do something creative, so I knit a section of all white stockinette, so I could do some patriotic decorations in duplicate stitch embroidery. I've only done duplicate stitch once before, on a Christmas stocking, so I figured I could use some more practice.
I grabbed a book in my craft room called "Tink's Second Book of Duplicate Stitch Alphabets" and a couple other books and patterns of duplicate stitch designs. Then, I sat in my craft room and pondered what would work best. I didn't have any patriotic patterns, so I put down the books and looked on the internet. I finally found some knitting charts for stars, so I decided to use those.
Next, I took at close look at the stockinette knitting I had done for the blanket, so I could see how many stitches I had to work with. 21 rows high by 94 stitches wide.
So, I picked an alphabet pattern in Tink's book that is 18 stitches high. This would make some BIG letters, saying "Go USA".
Then, I got a piece of graph paper, and charted out the stars and letters, before putting into Microsoft Excel. (I decreased the size of the columns in Excel, so they would be the right size for charting.) Next, I copied the design I made into MS Paint, did some variation with the colors, and ended up with this:
Not too bad for my very first charted design! :)
Then, I got together my materials:
Leaflet entitled "A Beginner's Guide to Duplicate Stitch"
Scissors
Yarn Needle
Glasses
Knitted Blanket
3 skeins of yarn for the embroidery: Light Blue, Dark Blue, Red
When I wanted to get started stitching, I realized that it would be much easier if I could enlarge the design for better viewing. So, I did my work at my computer, so I could view the design VERY LARGE on my computer screen.
Then, I started stitching. Here's the star on the right, with the blue part finished, and the red part getting started:
First star is done!
After that, the second star was quick work:
Then, I started doing the letters, from the last toward the first. So far, I've only finished "SA". Tomorrow, I'll get to work on "Go U..." ;)
I grabbed a book in my craft room called "Tink's Second Book of Duplicate Stitch Alphabets" and a couple other books and patterns of duplicate stitch designs. Then, I sat in my craft room and pondered what would work best. I didn't have any patriotic patterns, so I put down the books and looked on the internet. I finally found some knitting charts for stars, so I decided to use those.
Next, I took at close look at the stockinette knitting I had done for the blanket, so I could see how many stitches I had to work with. 21 rows high by 94 stitches wide.
So, I picked an alphabet pattern in Tink's book that is 18 stitches high. This would make some BIG letters, saying "Go USA".
Then, I got a piece of graph paper, and charted out the stars and letters, before putting into Microsoft Excel. (I decreased the size of the columns in Excel, so they would be the right size for charting.) Next, I copied the design I made into MS Paint, did some variation with the colors, and ended up with this:
Not too bad for my very first charted design! :)
Then, I got together my materials:
Leaflet entitled "A Beginner's Guide to Duplicate Stitch"
Scissors
Yarn Needle
Glasses
Knitted Blanket
3 skeins of yarn for the embroidery: Light Blue, Dark Blue, Red
When I wanted to get started stitching, I realized that it would be much easier if I could enlarge the design for better viewing. So, I did my work at my computer, so I could view the design VERY LARGE on my computer screen.
Then, I started stitching. Here's the star on the right, with the blue part finished, and the red part getting started:
First star is done!
After that, the second star was quick work:
Then, I started doing the letters, from the last toward the first. So far, I've only finished "SA". Tomorrow, I'll get to work on "Go U..." ;)
Tuesday, September 23, 2008
Frogging and Putting Back on the Needles
I know there are all these easy and fancy procedures for frogging or ripping rows of knitting, and then perfectly placing them back on the needles in just the right way.
Well, I'm not that kind of girl.
I just pull out the needles and start ripping.
Then, I put all the stitches back on smaller needles, and then knit the next row with needles of the original size. It just makes my life easier.
Of course, this would not work with silk or a lace project, but I'm very rarely doing that kind of knitting anyway. Most of my knitting is done for charity, with worsted weight yarn that stands up all by itself when you pull out the needles. Ha!
Now, the other day, I had a MONDO project to frog. I ran out of yarn when there were 50 stitches left on the row. It was one of our Oddball Lapghans, with 200 stitches on each row. And, of course, it HAD to happen on the wrong side row, which I needed to end on in order for the next color change to look right. So, that meant I had to unravel two rows. Bummer.... :(
So, I pulled out my needles, ripped out both rows, then carefully carried the entire blanket (it's almost complete now) and laid it out on my bed, so I could put the stitches back on knitting needles again.
While it was all laid out like that, I decided to measure it and see how big it was so far.
45 inches wide by 40 inches tall. So, it's almost complete! :)
Then, I went back in my craft room, and found a size 3 circular knitting needle that was 36 inches long. Perfect. ;)
Next, I leaned at the edge of the bed, and put the needle through each of the loose stitches. Easy-peasy!
All that was left was to add on my new yarn, and start knitting with the original size knitting needles. Mission accomplished!
Thursday, September 11, 2008
Wow! What a beautiful gift!
One of my friends in the Knitting Help Forum surprised me with an EXCELLENT gift. I could not believe it when I opened the package.
Glass Knitting Needles! I feel like Cinderella.....
I've always admired glass knitting needles, but never thought I would actually OWN a set!
I can't keep my hands off them. Now, I just have to decide what project I will start with them. It has to be something EXTRA special, that's for sure.
Neat!!!!
Also, a while back, another friend in the forum surprised me with some lovely peridot earrings that she had made for me! I am so spoiled by my friends in the forum.
Monday, September 1, 2008
UFOs are FOs now!
Yay! I was able to get a lot done this month during our "Turn your UFO's into FO's" knit along in the Knitting Help Forum.
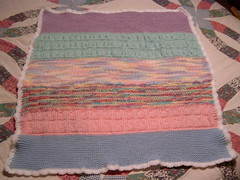
I finished the blue blanket I spoke about earlier:
I completed the "Wildflowers" Oddball Baby Blanket, which was worked on by 6 knitters in the forum.
I finished the "Barbie" Oddball Shawl, which was worked on by 6 KH Forum knitters.
I completed the "Moonlit Forest" Oddball Shawl, which was worked on by 5 forum knitters.
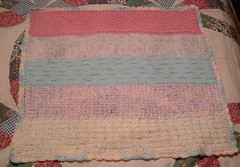
I knit the last section and added a crochet border on the "Fairy Land" Oddball Baby Blanket, which was worked on by 5 forum knitters.
And I bound off the "Pink Power" Oddball Baby Blanket, which was worked on by 6 knitters.
I also completed the "Nursery Rhymes" Oddball Preemie blanket, which was worked on by 5 knitters. I added the crochet border.
And I made a little coffee cup cozy for travel cups. I think I might have made it too small. I'll have to test it out first, and then I'll give a report. I made it with Berroco Hip Hop yarn.
So, it was a productive month for me. I still have several projects to complete, but at least I've made a dent in them!
Right now, I'm still working on these things:
Oddball Preemie Blankets
"Racecar Alley" - adding border
"Cherry Blossoms" - adding border
"Cloud Nine" - adding border
"Citrus Punch" - knitting last section, and adding border
"Beach Party" - re-knitting two sections and adding border
(there was a hole in this blanket that I could not repair, so I had to frog back through two sections)
Oddball Shawls
"Candy Shop", "Magic", "Flower Garden", "Shades of Pale" - finishing up
"Rainy Day" and "Angel Wings" - knitting a section
Oddball Blankets
#1, #2, Lapghan #1, Lapghan #2 - Knitting last sections, and adding border
I also have some personal knitting that I wonder if I will ever get to!
Cabled Baby Pullover for display at Cottage Yarn.
"Dream by Moonlight" Shawl
A bulky cardigan with Thick & Quick yarn.
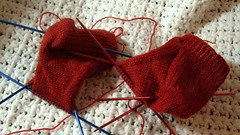
Some red ankle socks for my son.
A Harry Potter scarf.
A Fair-Isle headband
A baby sweater
And I haven't given up on the rectangle shawl for charity!
Subscribe to:
Posts (Atom)
Blog Archive
About Me
- Shandeh
- I'm a forum moderator and blogger for Spinrite Yarns (www.yarnspirations.com), and I spend WAY too much time there. :D You can also find me on the Knitting Help Forum occasionally