I'm so sore and tired, but the floor is BEAUTIFUL!!
I started this morning, sanding down the wood filler that Marvin had put in the nail holes last night. Then, I swept the floor again, and ran a vacuum over it.
Next, I layed some of the tiles on the floor to decide how I wanted to lay it out. I chose to just lay them straight. Originally, I wanted to lay them out diagonally, but when I tried it, it looked too messy. So, straight it was.
I've spent the last week reading online about how to install vinyl floor tiles. They say you should draw a line across the floor from the middle of both walls, to find the exact center of the room. So, I did that. I didn't have a chalk line, so I had to use measuring tape, a straight edge, and a pencil. That took a while.
Next, I started applying tiles in the center of the room, and kept going out toward the walls. I applied one row all the way to each side wall, so I could use them as a guide to keep the others straight.

I started getting the hang of it, and soon the tiles were going down quickly.

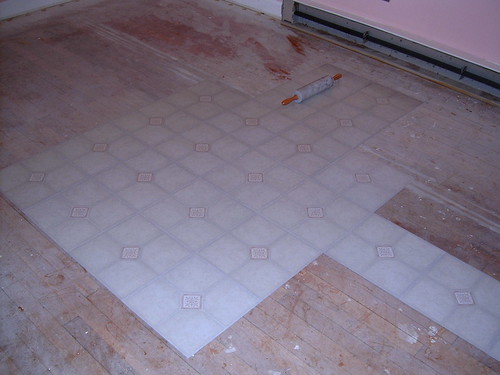
To make the tiles secure on the floor, I rolled each one down with a rolling pin.

My hubby Marvin had to handle the difficult spots, like where the cable cord came up through the wall:

Pretty soon, we had a mountain of backing paper in the middle of the room.

But all we had to do was glance at our completed work so far to keep us motivated!

Now, the floor is complete, and all is right with the world! :)


I can't believe how much nicer the room looks now. When it was finished, I laid down in the middle of the floor, and just soaked it all in. It amazes me to realize that just a week ago, this room was filled to the ceiling with boxes of junk, and there was ugly brown carpet on the floor!
This new vinyl tile makes a HUGE difference in the room.
Now, I can start setting up my craft stuff again! Yay! Yarn and Fabric, here I come!


2 comments:
Your craft room floor looks beautiful! I will come here for my step-by-step tutorial when I get ready to do the same!
Thank you, my friend!
:)
I'm as happy as a lark.
Post a Comment